• Bloglovin
  • Facebook
  • Instagram
  • Pinterest
  • RSS
  • Twitter
  • YouTube

all the sparkle

jessica frost-ballas

  • home
  • about me
    • about
    • creative resume
    • disclosure
    • house tour
  • Disclosure
  • craftroom
  • video tutorials
  • patreon
  • contact

Add a little sparkle… (part 2)

17 Sep

Good morning!  If you missed my first post on adding sparkle to your cards yesterday just scroll down or click here!  I also wanted to just say thanks to all my new blog followers!  I really appreciate your support and sweet comments!!

So, in continuing with my goal to share different methods of adding sparkle to your cards, I present a set of cards dedicated to my faithful crafting companion!

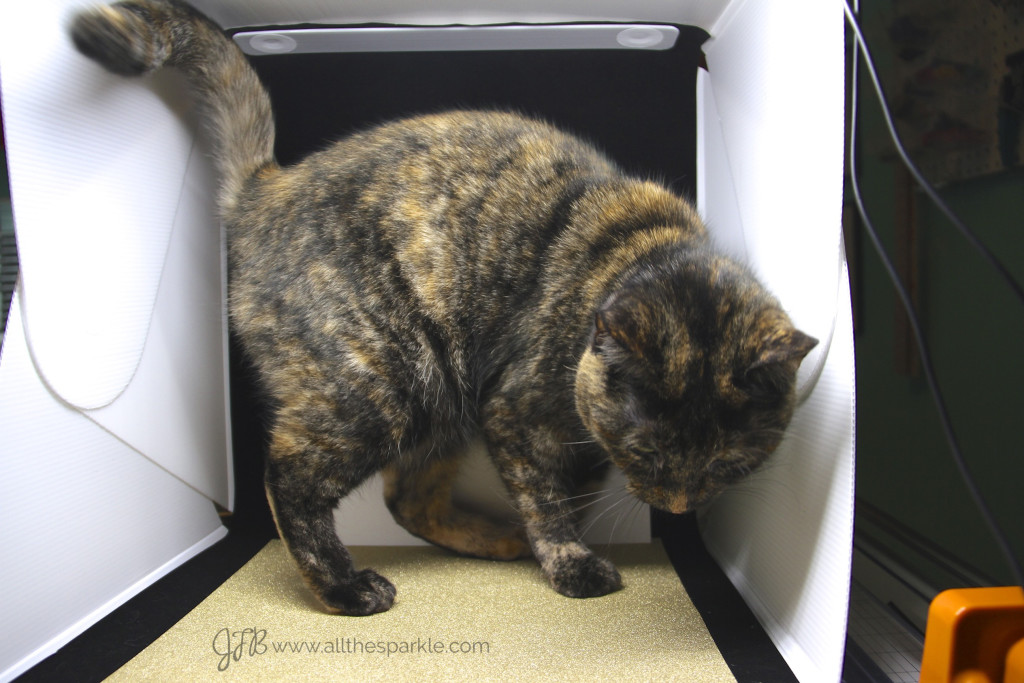
…who insists on trying to live inside my Foldio…

Seriously though…I was watching her sleep in my craft room a few days ago and was amused at how she’s able to sleep pretty much anywhere…perched on a window sill, draped over my Procision trimmer, with her head resting on my Silhouette…

So, here’s how she inspired my design for this set of cards:

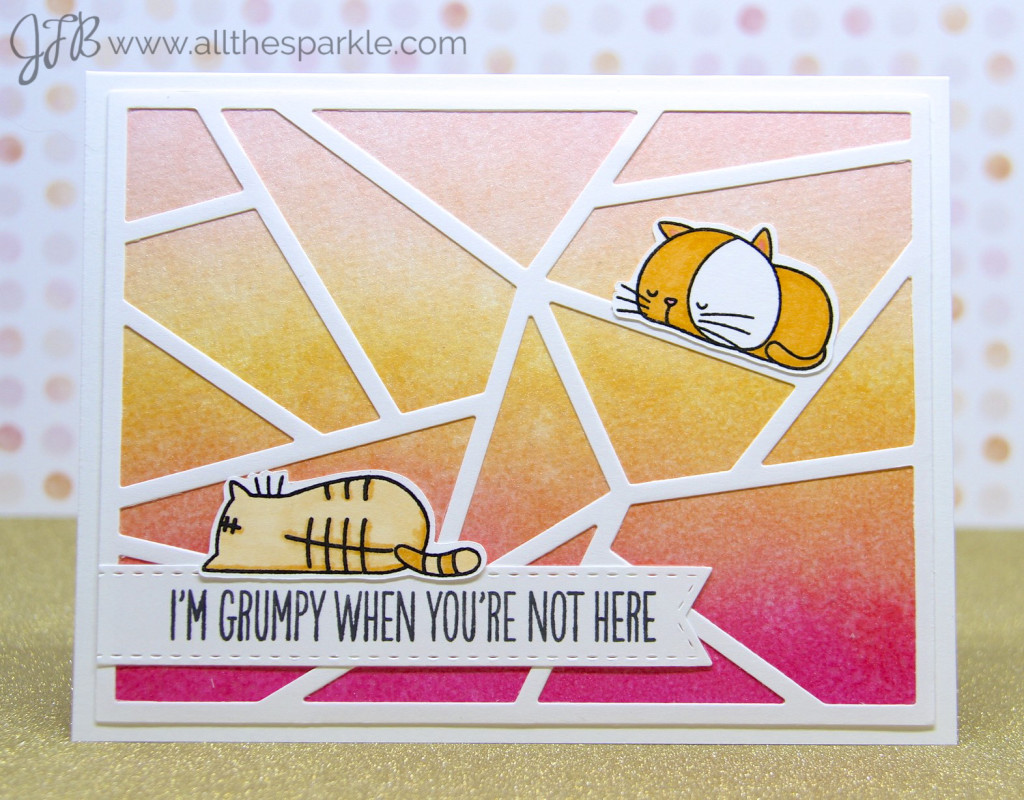
Ha…I still haven’t figured out how to color a tortoiseshell cat with copics so I’m sticking with tabbies… 😉 For my first card I blended distress inks in Spun Sugar, Dried Marigold, and Picked Raspberry onto Canson watercolor paper and let it dry.  To add sparkle to this background I covered (read wasted) it with wink of stella clear glitter.  It’s hard to see in the photo and up close it barely shows up.  Don’t get me wrong…it’s shimmery but it’s not sparkly.  I much prefer to use wink of stella in more concentrated doses in smaller applications like a sentiment or small image (like a heart).  It’s definitely not financially worth it to use wink of stella on a large area.
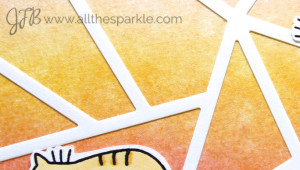
To complete the card I stamped several sleeping cats from the My Favorite Things I Knead You stamp set and colored them with copic markers.  I was originally planning on creating a shaker using the Abstract cover die but I was not having a good day with my foam mounting tape…I finally decided that it was a hint to not do a shaker and instead used the die to give my cats various resting places.  I stamped the sentiment from I Knead You on the Stitched Fishtail Banners from My Favorite Things and adhered it to the card with foam mounting tape.

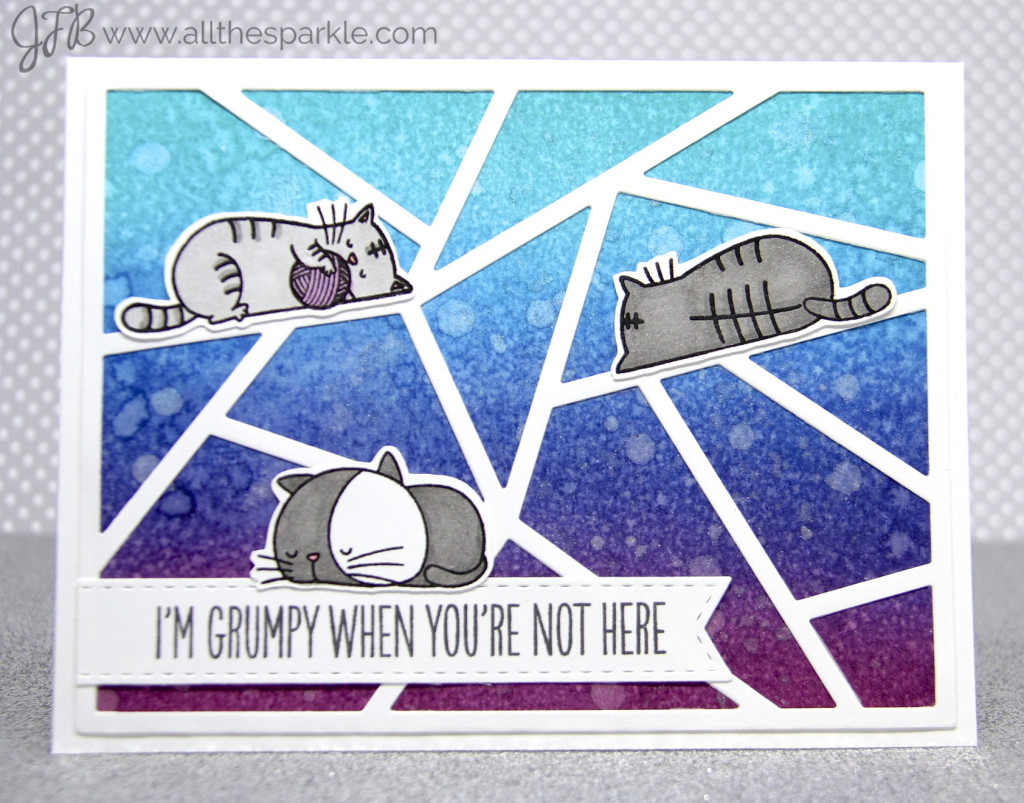
My second card follows a similar layout but uses cooler colors.

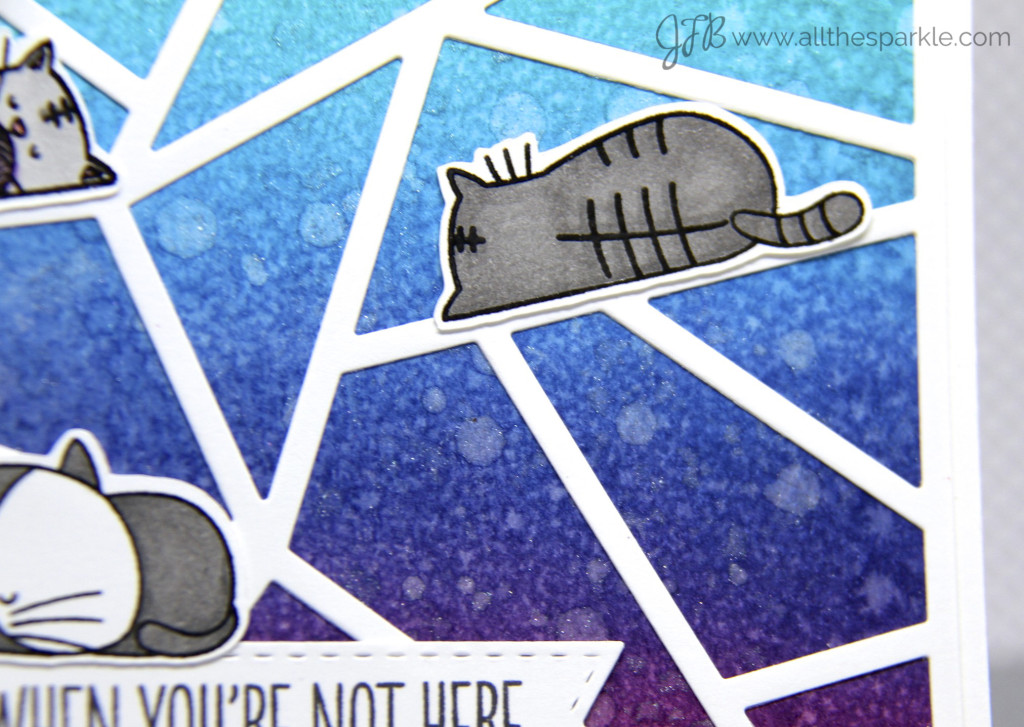
For this card I blended Salty Ocean, Chipped Sapphire, and Seedlesss Preserves distress ink onto watercolor paper and then spritzed it with the Tsukineko Frost spray.  I also flicked some of the spray onto the paper for the larger droplets.  After letting it sit for about 30 seconds I used a paper towel to blot off the large droplets and then let it air dry.  This is definitely sparklier than the first card and I like that the whole background is slightly shimmery and there are little pieces of glitter scattered throughout.

My next card is probably the most shimmery but the least sparkly…if that makes sense…

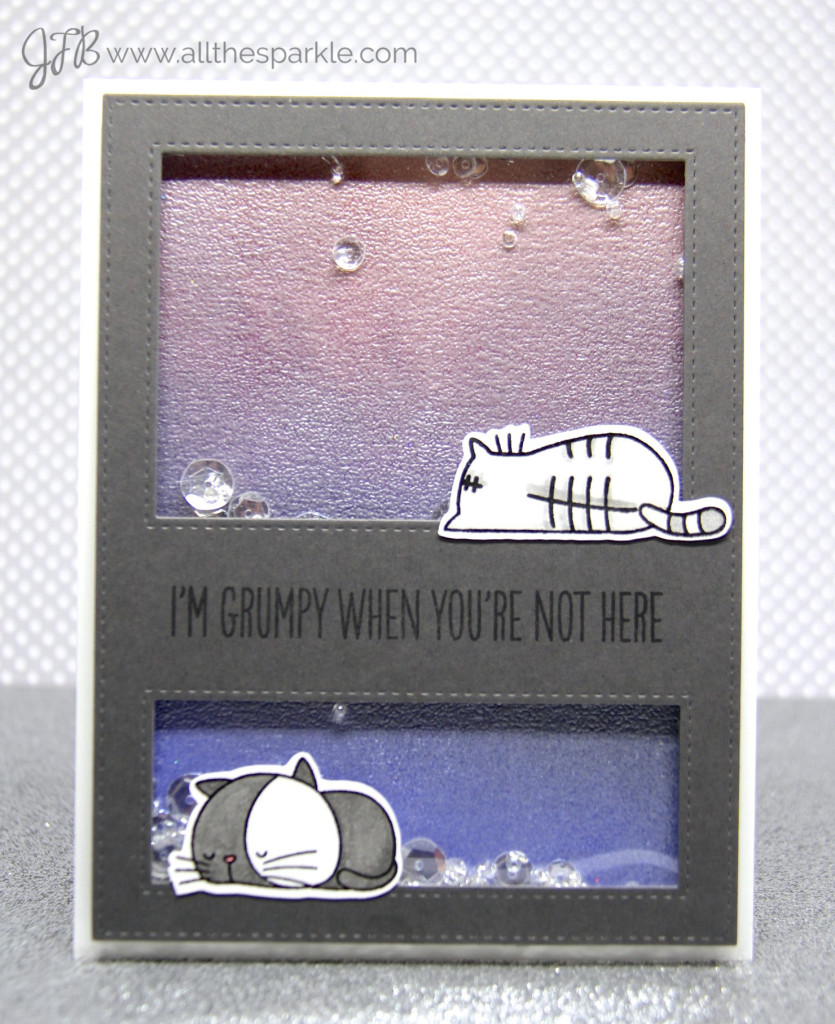
This was actually a total experiment…it turned out well in this case but not so well in another card attempt.  I started off by blending distress inks in Victorian Velvet, Aged Mahogany, Dusty Concord, and Shaded Lilac onto watercolor paper…you can’t really see the Dusty Concord  as it’s covered by the sentiment strip but you can see how it blended into the colors above and below it.  I loved my glittery embossing powder background from yesterday’s card and decided to see what would happen with Wow Silver Pearl embossing powder.  I stamped versamark all over the background and then applied the silver pearl embossing powder.  It created a really pretty background but really muted the color of the distress inks.  In fact, my other card using warmer colors was way too muted by the embossing powder.  So I like this effect but I’d recommend it only with darker distress inks.  I did create a shaker card using the Vertical cover-up die from my Favorite Things and added sparkly clear and silver beads and sequins.

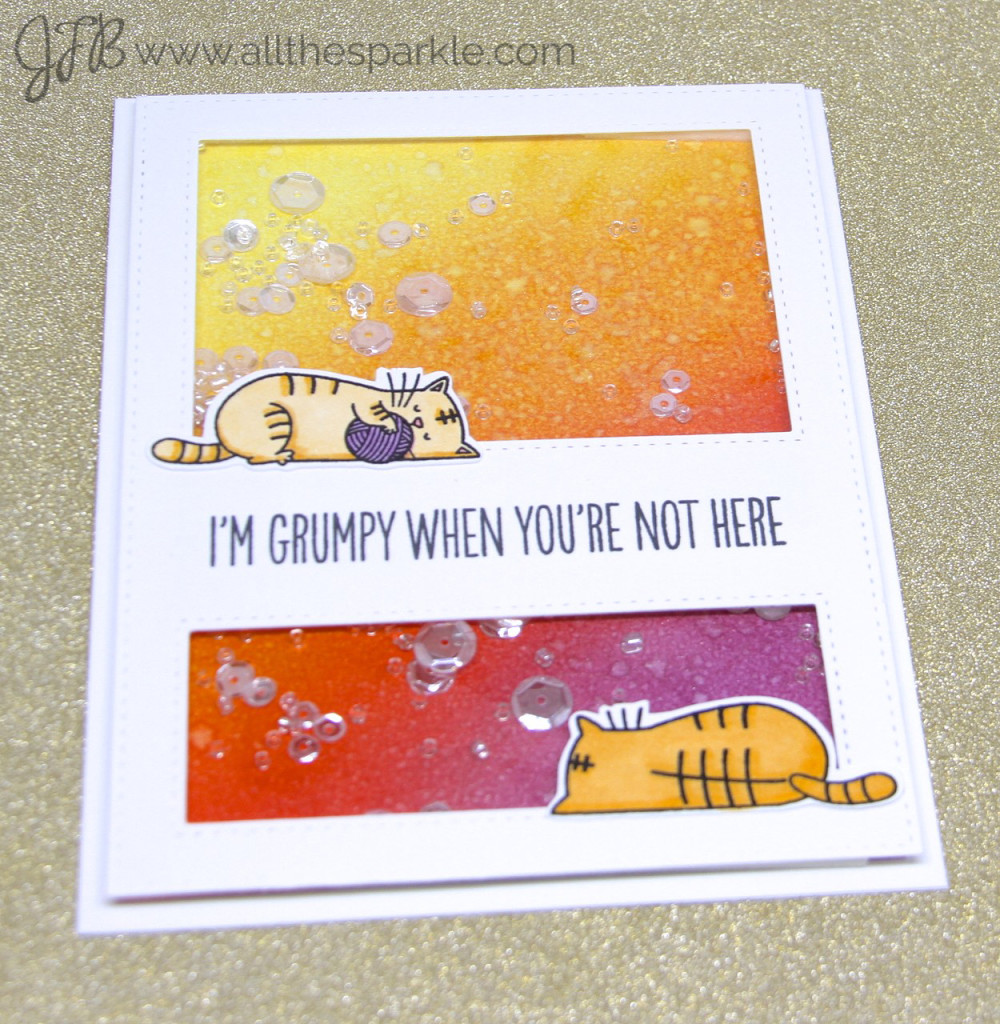
For my last card I followed a similar layout but used warmer colors in a diagonal design:

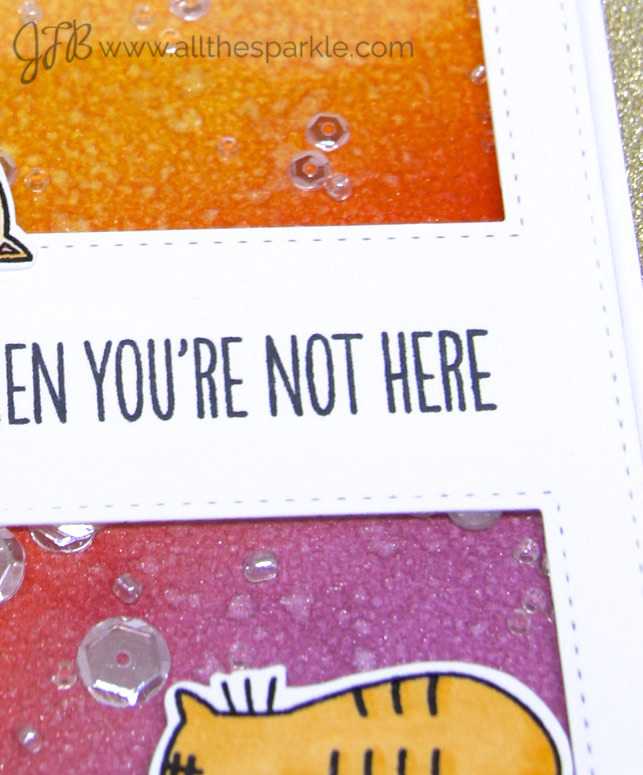
For this card I blended Squeezed Lemonade, Spiced Marmalade, Festive Berries, and Seedless Preserves distress inks onto watercolor paper.  Once the panel was dry I spritzed it with a blend of water and perfect pearls.  It created a soft shimmer with teeny tiny specks of glitter.

So there’s my second installment…thanks so much for visiting!  Tomorrow I’ll have one last group of cards using some slightly non-traditional methods of adding sparkle to your cards!  I’d love to know what you’re thinking?  Do you have a favorite method so far?  Anything else you’d like to see me try?

Supplies:

Ranger Perfect Pearls Pigment Powders, Pearl
ZIG Wink of Stella Glitter Brush Marker Pen 999 Clear
Tsukineko 2-Pack Pssst Sheer Shimmer Spritz, Ultra Fine Mist, Frost and Sparkle
Wow Embossing Powder WOW! Super Fine Embossing Powder, 15ml, Silver Pearl
EK Tools Powder Tool, New Package
Milwaukee Model 1400 Heat Gun
Sizzix 657900 Big Shot Cutting/Embossing Machine with Extended Multipurpose Platform, Powder Blue/Te
BB14 My Favorite Things Clear Stamp – BB I Knead You
My Favorite Things I Knead You Die-Namics Dies, 0.875 x .5
My Favorite Things Die-namics Stitched Fishtail Flag STAX MFT575
My Favorite Things Abstract Die-Namics Cover Up Dies
http://www.ellenhutson.com/my-favorite-things-die-namics-stitched-cover-up-companion-vertical/
Canson Watercolor Pad For Beginners 9 in. x 12 in.
Grafix Clear .005 Dura-Lar Film, 9-Inch by 12-Inch, 25 Sheets
Grafix Clear .003 Dura-Lar Film, 9-Inch by 12-Inch, 25 Sheets
WPlus9 Coal Mine Cardstock
Classic Crest Super Smooth Solar White 80# Cover 8.5
Ranger Multi Medium Bottle, 0.5-Ounce, Matte
Scotch CAT 085 Advanced Tape Glider with 2 Rolls of 1/4-Inch by 36-Yard Acid Free Tape,Cure Pink
3M Scotch 1/2-Inch by 36-Yard Double-Sided Foam Tape
Ranger Inkssentials Mini Misters, 3-Pack
The Ton Flurries Seed Beads
The Ton Diamond Seed Beads
The Ton Glass Slippers Sequins
The Ton White Satin Beads
Ranger 1-Inch Ink Round IBT40965 Blending Replacement Foams, Mini, 20-Pack
Ranger Ink Blending Tool, 1-Inch Round
Ranger Tim Holtz Distress Ink Pad, Festive Berries
Ranger Tim Holtz Distress Ink Pad, Shaded Lilac
Ranger Tim Holtz Distress Ink Pad, Dusty Concord
Ranger Tim Holtz Distress Ink Pad, Aged Mahogany
Ranger DIS-27195 Tim Holtz Distress Ink Pad, Victorian Velvet
Ranger Tim Holtz Distress Ink Pad, Seedless Preserves
Ranger DIS-27119 Tim Holtz Distress Ink Pad, Chipped Sapphire
Ranger Tim Holtz Distress Ink Pad, Salty Ocean
Ranger DIS-27164 Tim Holtz Distress Ink Pad, Spun Sugar
Ranger Tim Holtz Distress Ink Pad, Squeezed Lemonade
Ranger Tim Holtz Distress Ink Pad, Dried Marigold
Ranger Tim Holtz Distress Ink Pad, Spiced Marmalade
Ranger Tim Holtz Distress Ink Pad, Picked Raspberry
Copic Marker 72-Piece Sketch Set A
Copic Markers 36-Piece Sketch Basic Set
Copic Sketch Set of 6 Markers – Sketching Grays
Copic Marker 12-Piece Sketch Basic Set
Copic Markers 6-Piece Sketch Set, Skin Tones I
InLinkz.com


Share This:
Share on pinterest
Pinterest
Share on facebook
Facebook
Share on twitter
Twitter
Share on email
Email

You May Also Enjoy:

  • MFT Sketch Challenge #281 (+VIDEO)
  • Twinkling Stars LED Card with Chibitronics
    Twinkling Stars LED Card with Chibitronics
  • MFT Challenge Cards (AKA conquering my fear of sketch challenges)

Comments:
26 Comments
Categories:
card-making, crafting
Tags:
distress ink, mft stamps, shaker

« Add a little sparkle…(part 1)
So Suzy September Challenge – Happiness is… »

Comments

  1. KT Fit Kitty says

    September 17, 2015 at 9:17 am

    Love, love, love your kitty cards!

    Reply
  2. Rubeena says

    September 17, 2015 at 9:17 am

    These cats are adorable! Love those backgrounds.

    Reply
  3. HJ says

    September 17, 2015 at 9:21 am

    Beautiful cards. I love the colors and your explanation of how you made each sparkly in a different way.

    Reply
  4. Vickey E. says

    September 17, 2015 at 9:49 am

    Hi Jess,
    I love all your cards but I think the last one may be my favorite. It’s great to hear the different ways to add shimmer and sparkle. These are just too darn cute!

    Reply
  5. glow:) says

    September 17, 2015 at 10:20 am

    i absolutely love your experimenting with shimmer and shine.. i love them… your color combo for the last one is my go-to color pallete.. thanks and also for the lovely lil welcome:) i like…

    Reply
  6. Kara Lynne says

    September 17, 2015 at 3:20 pm

    I love how you perched those cats on the die cuts, they are too cute! Gorgeous backgrounds on every one of your cards!

    Reply
  7. karenladd says

    September 17, 2015 at 6:21 pm

    Oh my gosh, these cards are ridiculously adorable!! There’s just something about a sleeping kitty that always gets to me and the way you made them all unique is the best part! The first card, with the cats resting on their various perches adds a real whimsical touch to your design. LOVE these!

    Reply
  8. Celeste Goff says

    September 17, 2015 at 8:02 pm

    Such awesome cards! And Jessica, as a cat owner you should know that a cat will curl up anywhere you don’t want them to! LOL

    Reply
  9. Beth K says

    September 17, 2015 at 10:30 pm

    HEy JEss, I totally love your cards!! the abstract backgroud is such a great idea for the kitties to lay on….I think I need to be a millionaire, and that might not do it, to get alll the things i’d like to for making cards…tee-hee Thanks SO much for sharing your gift with us!
    oh, i almost forgot cuz i’m so tired, but i haven’t tried this but have seen some cards done using table salt, or sea salt if you want it to be courser on your cards. I think if was Laurel Beard who did it. It was a pretty cool efffect….

    Reply
  10. Shona Chambers says

    September 18, 2015 at 7:13 am

    These are all so fantastic! I love the idea of having the cats sleeping in funny places (which is so true!) and your backgrounds are amazing. I especially love the second card, those colours together are exceptional!!

    Reply
  11. SUSAN JACOBS says

    September 18, 2015 at 1:09 pm

    So cute. I love the idea. All the different backgrounds are great.

    Reply
  12. Bonnie says

    September 20, 2015 at 12:29 am

    Adorable cards! That’s cats for you…sleep anywhere they please! LOL

    Reply
  13. Jennifer says

    September 23, 2015 at 9:21 am

    Love those kitties and they work so well with the abstact ceover plate! I really like the color bloom sprays by Prima!

    Reply
  14. Ina Good says

    September 23, 2015 at 10:14 am

    I have 2 kitties so these hit home with me adorable!

    Reply
  15. Rosali says

    September 23, 2015 at 11:22 am

    I really love those card designs! They already catched my eye in the MFT linkup!! And you remind me to use my perfect pearls again! ??

    Reply
  16. Yvonne C. says

    September 23, 2015 at 12:22 pm

    Beautiful cards. Love the distress inks you chose, I’m new to distress inks so I’m glad you explain everything. Love the pearl shimmer.

    Reply
  17. Amye says

    September 23, 2015 at 1:01 pm

    Beautiful inspiration! Thank you!

    Reply
  18. Dot Freel says

    September 23, 2015 at 1:57 pm

    I loved all of your cards but my favorite was the 2nd one. 3 is my number though.

    Reply
  19. Sue D says

    September 23, 2015 at 3:27 pm

    Love these cat cards. We used to have a tortoise shell cat–she was my favorite cat and we have had quite a few. thanks for the info on the Wink of Stella–I just bought one.

    Reply
  20. Denise Bryant says

    September 23, 2015 at 6:22 pm

    Awesome background die and colors! LOVE the kitties! I am away from home right now and missing my Coco!

    Reply
  21. Nicole Sherwood says

    September 24, 2015 at 10:38 am

    Love them all. I want to go try some of those idea right now! Silly work gets in the way!

    Reply
  22. Robin says

    September 24, 2015 at 5:35 pm

    I am a cat lover so this card just spoke to me. Plus I love the way you used the stencil! I will definitely be following your blog!

    Reply
  23. Myra says

    September 24, 2015 at 9:40 pm

    Cute cards.

    Reply
  24. Miriam Prantner says

    September 25, 2015 at 2:08 pm

    Such fun cards! I just love how you combined the cats and the abstract die!

    Reply
  25. Jean Bullock says

    September 26, 2015 at 11:35 am

    Your cards are wonderful. How clever to take the Cover Up die and pair it with the sleeping kitties and the shaker cards are wonderful. Well done.

    Reply
Newer Comments »

Thanks for taking the time to leave a comment! I read and appreciate all of your thoughts! :) Please know comments are moderated so it may take a few minutes for it to show up! Cancel reply

This site uses Akismet to reduce spam. Learn how your comment data is processed.

Jessica About Me Photo
Hi, I'm Jess! Thanks for visiting my blog where I share my adventures in cardmaking and papercrafting! I hope I can inspire you to craft with a little extra sparkle!

Subscribe Via Email

Enter your email address to subscribe to this blog and receive notifications of new posts by email!

Join 3,113 other subscribers

Crafty Sales (updated regularly)

Favorite Crafty Shops

Instagram

This error message is only visible to WordPress admins

Error: No connected account.

Please go to the Instagram Feed settings page to connect an account.

Archives

  • ►2023 (14)
    • ►March (4)
    • ►February (6)
    • ►January (4)
  • ►2022 (57)
    • ►December (5)
    • ►November (5)
    • ►October (6)
    • ►September (6)
    • ►August (5)
    • ►July (5)
    • ►June (5)
    • ►May (8)
    • ►April (2)
    • ►March (2)
    • ►February (5)
    • ►January (3)
  • ►2021 (90)
    • ►December (4)
    • ►November (3)
    • ►October (6)
    • ►September (7)
    • ►August (6)
    • ►July (6)
    • ►June (8)
    • ►May (8)
    • ►April (6)
    • ►March (9)
    • ►February (11)
    • ►January (16)
  • ►2020 (111)
    • ►December (11)
    • ►November (15)
    • ►October (8)
    • ►September (16)
    • ►August (12)
    • ►July (17)
    • ►June (8)
    • ►May (1)
    • ►April (6)
    • ►March (6)
    • ►February (6)
    • ►January (5)
  • ►2019 (171)
    • ►December (12)
    • ►November (17)
    • ►October (12)
    • ►September (22)
    • ►August (15)
    • ►July (17)
    • ►June (21)
    • ►May (15)
    • ►April (11)
    • ►March (10)
    • ►February (10)
    • ►January (9)
  • ►2018 (209)
    • ►December (11)
    • ►November (16)
    • ►October (10)
    • ►September (36)
    • ►August (11)
    • ►July (12)
    • ►June (16)
    • ►May (21)
    • ►April (21)
    • ►March (19)
    • ►February (19)
    • ►January (17)
  • ►2017 (246)
    • ►December (20)
    • ►November (20)
    • ►October (21)
    • ►September (22)
    • ►August (23)
    • ►July (21)
    • ►June (20)
    • ►May (21)
    • ►April (15)
    • ►March (21)
    • ►February (19)
    • ►January (23)
  • ►2016 (225)
    • ►December (16)
    • ►November (17)
    • ►October (22)
    • ►September (23)
    • ►August (19)
    • ►July (18)
    • ►June (18)
    • ►May (19)
    • ►April (17)
    • ►March (23)
    • ►February (22)
    • ►January (11)
  • ►2015 (287)
    • ►December (16)
    • ►November (32)
    • ►October (15)
    • ►September (21)
    • ►August (14)
    • ►July (16)
    • ►June (23)
    • ►May (25)
    • ►April (27)
    • ►March (37)
    • ►February (40)
    • ►January (21)
  • ►2014 (69)
    • ►December (4)
    • ►November (14)
    • ►October (19)
    • ►September (15)
    • ►August (4)
    • ►July (10)
    • ►May (3)
  • ►2013 (45)
    • ►November (6)
    • ►August (7)
    • ►July (3)
    • ►June (7)
    • ►May (2)
    • ►April (1)
    • ►March (3)
    • ►February (16)
  • ►2012 (11)
    • ►November (1)
    • ►September (9)
    • ►February (1)

Disclosure

I design for several companies because I truly love their products! Anything I recommend on my blog is something that I genuinely love and regularly use. I do not get paid for product reviews and I will never recommend a product that I do not like or would not use.

I am affiliated with several of my favorite crafty companies which means I receive a small commission (at no additional cost to you!!) when you click on one of my links and make a purchase through the store.

You can find my full disclosure as well as a list of the companies I am affiliated with HERE. Thank you so much for supporting me!

Most Popular Posts

Zig Clean Color Real Brush Swatch Card Download and a revelation!
Nuvo Drop Swatch Chart (+printable!)
Mystery Box Destash for a Cause!!
Anita Jeram Summer Garden Release (+GIVEAWAYS!)
VIDEO: Distress Oxide Ink Blending Combos with Kitsch Flamingo
VIDEO: Distress Oxide Ink Blending Combinations and Swatch Book
Waffleflower March Release Blog Hop (+GIVEAWAYS!)
WaffleFlower March Release Blog Hop (+GIVEAWAYS!)
Giving Tuesday Mystery Box Auction
Hero Arts March My Monthly Hero Kit Blog Hop (+GIVEAWAY!)

Copyright

Creative Commons License
This work is licensed under a Creative Commons Attribution-NonCommercial-NoDerivs 3.0 United States License.

Copyright © 2023 · Bloom theme by Restored 316

Copyright © 2020 · All The Sparkle · Blog Designed by Riss Blog Design.