Good morning! This is my first post as a member of the Chibitronics Design Team! I discovered Chibitronics a few months ago when I had the idea to try and add lights to a card and went looking to see if there were any products on the market to do that! I’ve used their circuit stickers to create two cards that you can see here and here! For today’s card I was inspired by all the lightning bugs flashing around in the backyard at night and thought it’d be fun to make a get well card with a light-up bug! So, here’s my card:
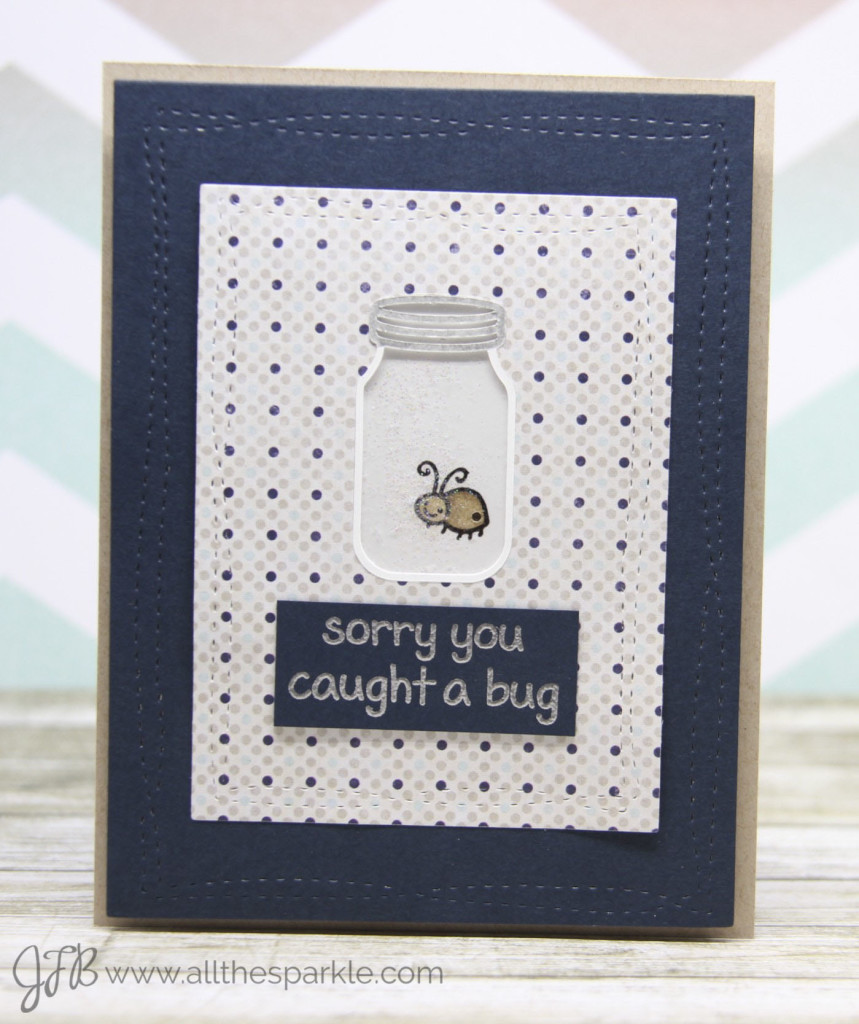 I started off by die-cutting a mason jar cut file from white cardstock with my Silhouette Cameo. Then I die-cut the same image from the dotted patterned paper and adhered acetate behind the patterned paper. I inlaid and adhered the white jar outline on top of the acetate and applied a little silver wink of stella to create the lid. On the back of the panel I created a tiny shaker by applying a frame of fun foam around the jar and filled it with super fine glitter. I stamped the bug from a Lawn Fawn stamp set with Versafine and heat-embossed it on white cardstock with clear embossing powder. I colored him with copic markers and added a lot of shimmer with my clear wink of stella pen. I punched a tiny hole in his abdomen where I wanted the light to shine then I adhered the white panel to the shaker to seal in the glitter. I matted the patterned paper to a frame of dark blue cardstock and then set that aside to work on my circuit!
Whenever I use the LED lights from Chibitronics I like to sketch out my circuit to make sure that my plan will work as I intended. Then I create the circuit on a scrap piece of white cardstock so that I can adhere it to my card panel. Here’s the circuit:
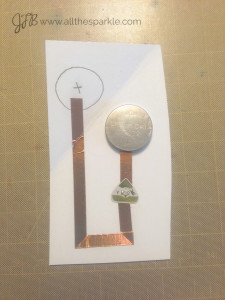 Once the circuit was created I lined up my LED light with the hole on the bug and then adhered the positive side of the battery to the card panel.
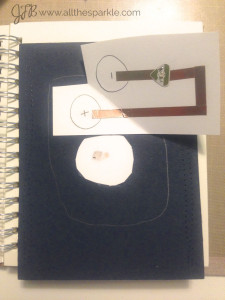 Since the battery is thick I wanted to add a few layers of fun foam so that the battery wouldn’t make my card lumpy. I glued two pieces of fun foam together and then cut a hole in the middle for my circuit. I traced that hole onto the back of the panel so I could see exactly where to line up the fun foam. Then it was time to assemble the card!
I used my ATG gun to adhere the positive side of the battery to the back of the panel and then put a little ATG gun adhesive on the negative side of the battery so that it wouldn’t slide around once the card was sealed up. Then I folded the rest of the circuit down along the score line and adhered the frame of fun foam over the back of the panel. I stamped the sentiment on a matching piece of dark blue cardstock, heat-embossed it with silver embossing powder, and adhered it to the card panel. Finally I mounted the panel to a side-folding card base of Neenah Desert Storm cardstock! Here’s the card lit up:
![]() And in dimmer light – so you can really see how my little bug shines!
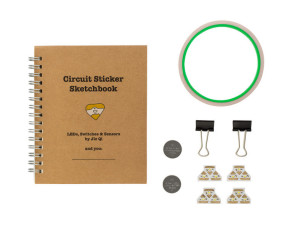
And in dimmer light – so you can really see how my little bug shines!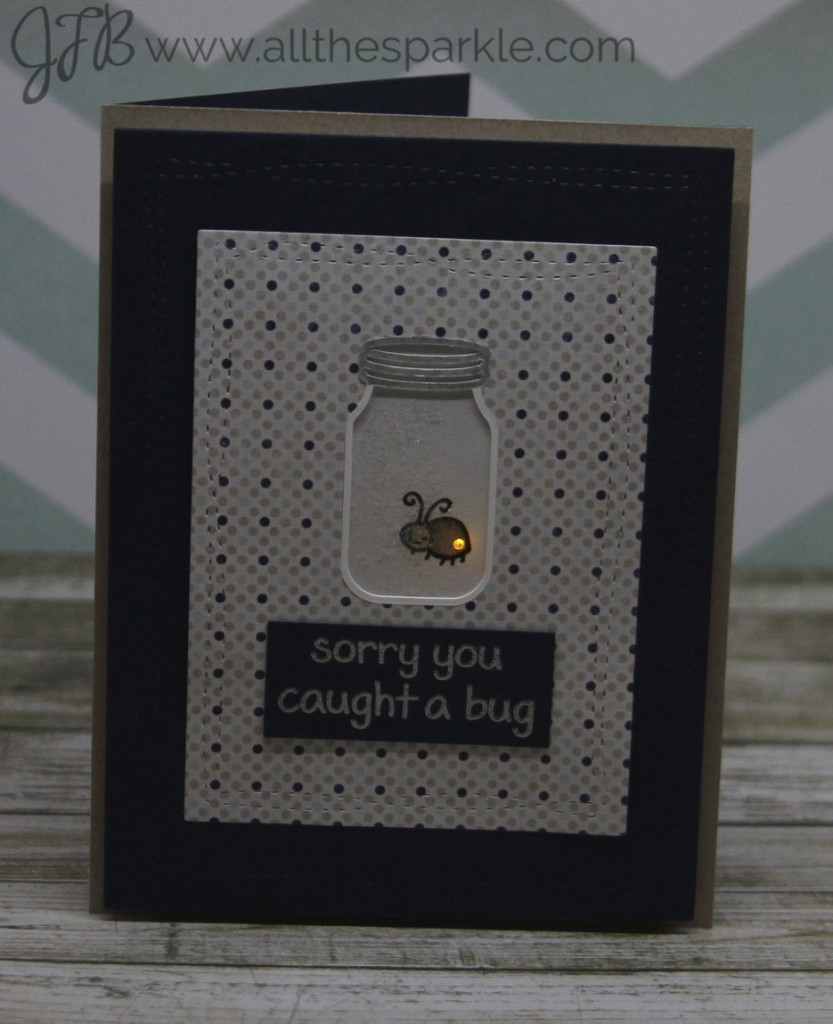 Isn’t he cute?! I just love the way using LED lights totally changes the card! If you’re interested in trying to add lights to your card I HIGHLY recommend this beginner kit from Chibitronics. I literally knew NOTHING about creating circuit prior to receiving that beginner kit…it is fabulously well-written and explains everything clearly with cute (and helpful) illustrations! I hope you’ll give them a try and come back and tell me what you thought! 😉
Thanks so much for visiting and see you tomorrow for an extra special post! Ha ha, I know I said that yesterday but there’s all sorts of exciting stuff happening this week and you definitely don’t want to miss it! 😉
GIVEAWAY:
And if you’re interested in trying out the Chibitronics LED stickers leave a comment on this post and let me know what you’d like to light up! On Monday morning I will choose a winner to receive the Chibitronics starter kit! If you already placed an order today I will try and see if they can substitute extra lights, sensor, or effect stickers instead! Good luck!
 Oh and if you’re on instagram, make sure to check out my account @JessicaAFrost for a chance to win a new stamp set from Altenew and some other crafting goodies as part of my 700 IG followers giveaway!


So cute!!!
What a cute little bug…so adorable.
I LOVE This idea!! I would LOVE to try this for a Light of HOPE Card for a friend who is going through double Breast Cancer. This is such a amazing idea!!
I absolutely adore your card with the lightup lightning bug!!! That would certainly cheer up anyone’s spirits!
I would like to make a card for my mother who is dying of cancer. I’d like to make a card that shows a “light” at the end of the tunnel. I want her to know that beyond this life of pain there is hope and the promise of a new body that will never again feel pain.
These are so cool!! I would make a card that said your the twinkle in my eye with a fun stamp!
This would be great to use on a Rudolph the red nosed reindeer Christmas card!
I would love to light up a star of Bethlehem! I think that would be amazing.
I’m thinking I’d like to make a little robot card and make his eyes light up. Wouldn’t that be cute?!
Awesome! I’ve had the Chibitronics set on my wishlist for a few months waiting for my budget to open up. Of COURSE I want to CASE yours now : )
I had thought to use Chibitronics LEDs with a Unity Phyllis Harris stamp (Reach for the Stars) I also want to see if it will work behind the Lawn Fawn Critters of the Sea Octopus on vellum to make look like a jellyfish. I also want to re-do the card I did in the following link – with Kraftin’ Kimmi’s Gaia and the sentiment The Best Friends Are Like Stars: The True Ones Shine -adding a cool glowing star!. https://dannscraftingwhims.wordpress.com/category/papercraft/cards/friendship-cards/page/2/
Thanks for the chance to win a set!!
All I can say is Wow! (Pick up jaw off the floor)
Stumbled across your blog and glad that I did. Have wanted to make my cards stand out a bit more and now I’ve found the way.
Thanks so much for your post!
I’m new to your blog and I know I will spend HOURS here! Thanks for the inspiration and chance to win!
Now how fun is this?!
This looks so fun! I would like to use it to light up a starry night!
OMGosh!!! I can hardly stand it–I’m way over into cuteness overload!!! I make cards for chronically sick kids and their siblings, and I’d SO love to light up their Christmas trees with these–I mean, I’d do the star on the top of the tree!! That would be super fantabulously awesome sauce!!! Thanks so much for the chance to win!! (clapping–with excitement)
my 1st time seeing this.didn’t even know anything like this was possible.i’m thrilled~
Your card is adorable Jessica! After reading the comments, there are so many fabulous ideas and any I thought of have already been mentioned. Maybe I could use them on a card for my dad, he is a movie buff. I would place lights as a frame surrounding the main attraction and it would look like a night at the drive-in!
So cute! These would be fun for car headlights or I really want to make a Rudolph card now. It’s still Christmas in July for 3 hours. Haha. Thanks for the chance to win 🙂
Jessica, what a friggin’ cool card! I never would have thought to introduce this type of tech to a card. You rock rock rock! There are so many ideas you have created with this awesome card. Thank you so much!
I love the lighted bug. So cute! This is a new technique to me and now I want to learn how to do it. Congrats on being a guest designer for Catherine Pooler.
Your card is great! Love this idea of light on our cards. Thanks for the chance to win!
I would love to light up a jack-o-lantern on my Granddaughter’s Halloween card this year! That would be awesome!
I would use it just as you have! I love lightening bugs!
Absolutely adorable!
Oh such a pretty card. I would use these to light up Christmas trees on a card.
adorable! I will definitely be looking these up!